If your car's touchscreen is cracked, unresponsive, or just dead, you've probably already looked up replacement options and wondered whether you can handle the job yourself. The short answer is: most people can. But the difference between a clean install and an expensive mistake usually comes down to a few specific steps that first-timers consistently miss.
We've helped over 150,000 people restore their Cadillac CUE and other automotive touchscreen systems. Here's what you actually need to know before you start.
The Honest Difficulty Level
Car touchscreen replacement falls somewhere between swapping a car battery and doing a brake job. It doesn't require professional mechanical training, but it does require patience, the right tools, and a willingness to slow down at a few critical moments. Rush any of those moments and you can turn a $100 fix into a $900 problem.
The job itself mostly involves careful trim removal, managing a small ribbon cable, and reassembling everything in the right order. The physical difficulty is low. The detail required is high.
Before You Even Start: Don't Cheap Out on the Screen
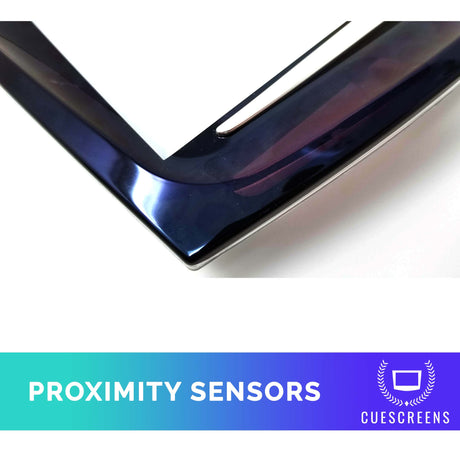
If you found this article after purchasing a $20 to $55 screen from an online marketplace, stop before you install it. Roughly half of those screens arrive dead on arrival. The ones that do work frequently fail in direct sunlight, have non-functioning proximity sensors, and ship with dust, foam, or debris embedded between the screen layers.
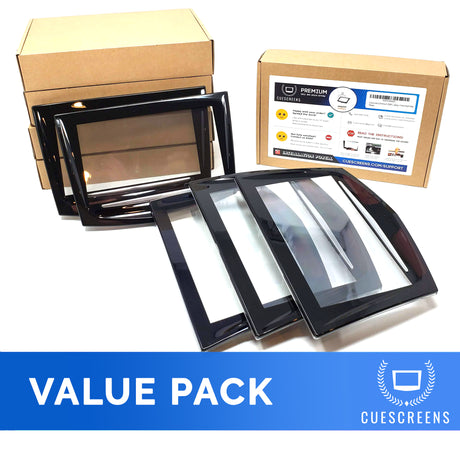
Customers who go that route usually end up paying for installation twice — once for the cheap screen, and again after ordering a replacement. Genuine Cuescreens replacement products are new, never refurbished, and backed by real technical support. Look for the Genuine Cuescreens logo before you buy.
The Tools You Need
This is one step beginners consistently skip: use plastic trim tools only. Metal tools will scratch trim panels and delicate plastic surfaces. You can find plastic trim tools on the Cuescreens store page. You'll also want micro ESD pliers for handling the ribbon cable locking clip, and a toothpick or non-metal picking tool for the ribbon cable itself.
When the module is removed from the dash, set it on a soft surface during the screen swap. Even a slight scratch on the unit can be frustrating to look at every day.
The Steps That Actually Matter
1. Leave the White Flex Cables Alone
Inside the unit you'll see white flex connectors. Do not touch them. There is no step in a standard screen replacement that requires removing any white flex cable. These connectors are extremely delicate and very difficult to reconnect once detached. If you find yourself needing to remove one, you've made a wrong turn somewhere — stop and reassess before going further.
2. Handle the Ribbon Cable Like It's Made of Paper
The screen ribbon cable is the single most common source of installation failure. In the overwhelming majority of cases where a new screen doesn't respond after installation, the ribbon cable either wasn't fully seated or was torn during the process. If it's damaged, you need a new screen — it's not covered under warranty.
The cable comes tucked into the display during shipping. Pull it out gently using a toothpick or similar non-metal tool. When inserting it into the module slot, orient it correctly: black side facing up, gold pins facing down toward the circuit board, large tab toward you. Seat it fully before locking the clip.
Avoid routing the ribbon cable through any tight openings — it's easy to damage the cable by forcing it through a hole that's too small.
3. Be Careful with the Black Locking Clip
The ribbon cable is secured by a small hinged black clip. This clip is fragile. To disengage it, use micro ESD pliers and carefully lever the tab upward — do not yank it. If the clip snaps off and falls inside the unit, a full module replacement runs around $900. When reinstalling, press down until you feel or hear it click into place.
4. Get the Alignment Pins Right Before Tightening Anything
This step cracks more screens than anything else. The replacement screen has plastic alignment pins on both sides that must pass through corresponding metal holes in the housing before any screws are tightened. If you skip the pins and go straight to the screws, the screen will crack.
Get both pins seated first. Then tighten screws. And if you have a screw or two that don't align — different Cadillac CUE module suppliers mean slight variations in screw hole positioning — just leave those screws out. The screen is fully secure with seven screws. Do not force misaligned screws.
5. Test Before You Put Everything Back Together
Once the new screen is installed and everything is connected, turn the car on and test before reassembling the trim. This saves you from having to pull the whole thing apart again if something needs adjustment.
On 2017 and newer vehicles: it's completely normal for the screen to appear unresponsive immediately after installation. Leave the system plugged in, lock the car, and wait about 15 minutes. Unlock and test again before assuming something went wrong.
When to Let Someone Else Do It
If you're not comfortable handling small connectors and ribbon cables, the math may favor a mail-in repair service. The cost of a single installation mistake — especially a snapped locking clip or torn ribbon cable — can exceed what a professional service would have charged. Cuescreens offers a mail-in service that handles the repair for you.
Video Walkthroughs
If you want to see these steps in action before you start, Cuescreens has video installation guides at cuescreens.com/pages/videos. Watching the ribbon cable and alignment pin steps once before you attempt them in person is worth the ten minutes.
Summary: What First-Timers Get Wrong
The job is doable. But first-timers consistently make the same mistakes: buying a cheap screen and dealing with the fallout, using metal trim tools, rushing the ribbon cable, skipping the alignment pins, and not testing before reassembly. Avoid those five things and you're very likely to end up with a clean install on the first try.
Questions before or during your install? Contact Cuescreens — we're here to help.
Frequently Asked Questions
Is it hard to replace a car touchscreen yourself?
It's manageable for most people with basic mechanical aptitude, but it requires patience and attention to detail. The most common failure points are the ribbon cable and the alignment pins — both of which can cause the screen to stop working or crack if mishandled.
What tools do I need to replace a car touchscreen?
Plastic trim tools are essential. Metal tools can scratch trim panels and delicate plastic surfaces. You'll also want micro ESD pliers for the ribbon cable locking clip and a toothpick or similar non-metal tool for pulling out the ribbon cable connector.
Why won't my new car touchscreen turn on after installation?
In most cases, the ribbon cable is not fully seated or was damaged during installation. On 2017 and newer vehicles, it's also normal for the screen to appear unresponsive right after replacement. Leave the system plugged in, lock the car, and wait about 15 minutes before testing again.
Can I damage my car's infotainment system by replacing the screen myself?
Yes. The most serious risks are tearing the ribbon cable, snapping the black locking clip (which requires a full module replacement), removing white flex connectors that should never be touched, and cracking the screen during reassembly by skipping the alignment pins.
Should I buy a cheap replacement touchscreen?
No. Cheap replica screens have an extremely high dead-on-arrival rate, frequently fail in direct sunlight, and often have non-functional proximity sensors. Customers end up paying for installation twice. Genuine Cuescreens replacement products are new, never refurbished, and backed by real technical support.
![[Premium] Upgraded Gel-Free Cadillac CUE Replacement Touch Screen Display-Cuescreens](http://www.cuescreens.com/cdn/shop/files/7c1892_b5fcaf040dfe42abb289e47b1fa91ab9_mv2.png?v=1738265347&width=460)


![[Premium] Upgraded Gel-Free Cadillac CUE Replacement Touch Screen Display-Cuescreens. Supports Proximity Sensors.](http://www.cuescreens.com/cdn/shop/files/7c1892_7faa9297eab444d5a99838357b9c178c_mv2.png?v=1764720901&width=460)