If your factory touchscreen is cracked, unresponsive, or failing, your first instinct might be to assume the repair requires a dealer visit, specialized tools, or serious mechanical skill. That assumption stops a lot of people from doing something they could easily handle themselves. The truth is, replacing a car touchscreen is one of the more approachable DIY jobs you can do, and most first-timers wrap it up in under 90 minutes.
Here is what you actually need to know before you start.
What Kind of Job Is This, Really?
Replacing a factory infotainment touchscreen is not an engine job. You are not touching anything mechanical. The process is closer to disassembling consumer electronics than working on a car in the traditional sense. You remove trim panels, unplug connectors, swap the screen, and put it back together.
The skills it requires: patience with plastic trim clips, comfort following step-by-step instructions, and enough care not to rush. That is genuinely the ceiling for most installs.
Most people who have never worked on a car before complete this job successfully on their first attempt.
Difficulty Level by Vehicle Type
Not every vehicle is identical, but the job tends to fall into a predictable range depending on how the screen is integrated into the dash.
| Vehicle Type | Typical Difficulty | Primary Challenge |
|---|---|---|
| GM (Chevy, GMC, Buick) | Beginner | Straightforward trim removal, accessible connectors |
| Chrysler / Jeep / RAM | Beginner to Intermediate | Multiple trim layers on some models |
| Hyundai / Kia | Beginner | Simple bezel design, plug-and-play fitment |
| Mazda | Beginner | Compact dash layout, easy harness access |
| Subaru | Intermediate | More surrounding trim to remove on certain trims |
| Acura / Honda | Beginner to Intermediate | Clean design, minimal tooling required |
If your vehicle is on this list, you are working with a well-documented job. Cuescreens screens are direct-fit replacements, meaning they connect to your existing wiring harness without modifications, adapters, or dealer programming.
Tools You Actually Need
You do not need a professional tool kit. Here is what gets used on the vast majority of installs:
- Plastic trim removal tools (a basic set costs around $10 and prevents scratched panels)
- Phillips screwdriver or Torx driver set
- A 7mm or 10mm socket on some vehicles
- A phone or tablet to reference the installation guide as you work
That is it. Do not use metal pry tools on trim panels. The plastic clips that hold bezels in place snap into specific retention points, and metal tools crack them. Plastic trim tools are not optional.
How Long Does It Take?
First-timers typically finish in 45 to 90 minutes. People who have done it once before often wrap up in 30 minutes or less. The time variation comes down almost entirely to how stubborn the trim panels are on your specific vehicle and how carefully you reference the guide while working.
Do not rush the trim removal. That is where the only real risk lives in this job.
The Steps, From Start to Finish
1. Disconnect the battery first
Before touching anything, disconnect the negative terminal of your battery. This protects your vehicle's electronics and prevents any accidental shorts while connectors are exposed. It takes 30 seconds and removes all risk from the electrical side of the job.
2. Work the trim bezel free
The decorative trim panel surrounding your touchscreen is held by push-clips around its perimeter. Start at one corner, insert a plastic trim tool, and work slowly around the panel. You will hear and feel small pops as each clip releases. This is the step people are most anxious about the first time, and it is genuinely not as scary as it sounds. The clips are designed to be removed and re-clipped.
3. Remove mounting hardware
With the bezel off, you will see the screws holding the screen unit in place. Remove them and slide the screen out toward you. On most vehicles, this takes two minutes.
4. Disconnect the harness
Take a quick photo of the connectors before unplugging anything. Press or slide the locking tab on each connector and pull them free. You are not cutting or splicing anything.
5. Connect the new screen
Plug your Cuescreens replacement into the same connectors. Direct-fit means exactly that. Everything lines up and locks in the same way the factory screen did.
6. Test before you button it up
This step saves a lot of frustration. Reconnect the battery and power on the vehicle before reinstalling any trim. Confirm the display comes on, the touchscreen responds, and everything connected to the infotainment system is working. If something needs attention, it is much easier to address now than after the dash is reassembled.
7. Reinstall the trim
Secure the screen with its mounting screws, align the bezel with the dash opening, and press it evenly into place. Press along the edges rather than the center to reseat the clips cleanly.
Does Replacing Your Touchscreen Void Your Warranty?
This is one of the most common concerns, and it is mostly unfounded. Under the Magnuson-Moss Warranty Act, a manufacturer or dealer cannot void your vehicle warranty simply because you replaced a part yourself or used an aftermarket component. They would need to prove that the specific replacement part caused the specific failure they are denying coverage for.
Replacing a touchscreen with a direct-fit OEM-style unit does not touch your drivetrain, suspension, engine, or any component that typical warranty claims involve. In practice, this concern rarely materializes into an actual issue for customers who perform clean, competent installs.
What Can Actually Go Wrong
Most failed DIY installs come down to a handful of preventable issues:
- Cracked trim clips from using metal tools or forcing panels instead of working slowly with trim tools
- Forgotten connectors that were not fully seated before the dash was buttoned up, causing partial display or touch issues
- Skipping the pre-reassembly test and discovering a problem only after the trim is back in place
- Wrong part for the vehicle, which is avoided by confirming compatibility before ordering
None of these are hard to avoid. They are all process issues, not skill issues.
Where to Find Cuescreens Installation Guides and Video Tutorials
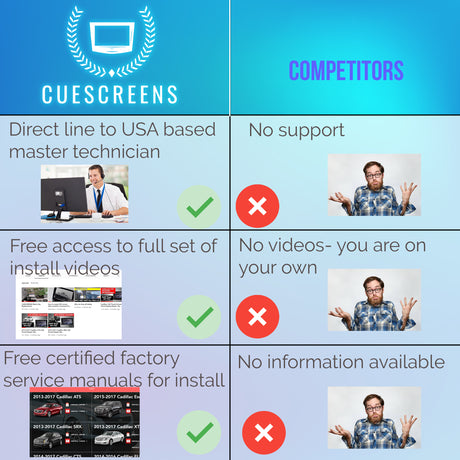
Before you start your install, review the resources Cuescreens provides for your specific vehicle. The installation guides cover the process step by step, and the video tutorials walk you through the job visually so you know exactly what to expect at each stage.
Watching the video for your vehicle before you pick up a trim tool is the single best thing you can do to make the job go smoothly. It turns an unfamiliar process into one you have already seen done.
Is This the Right Job for You?
If you can follow written instructions, work carefully, and take 10 minutes to watch a how-to video beforehand, yes. This is the right job for you.
Cuescreens sells only new touchscreen replacements, manufactured to direct-fit specifications for each supported vehicle. There is no programming required, no dealer visit, and no proprietary tools. The job is designed to be completed at home with tools most people already own or can pick up inexpensively.
If your screen is failing, the path forward is shorter and simpler than most people assume. Start with the video tutorials, confirm your vehicle compatibility, and order the correct replacement. The rest is a Saturday afternoon.
Frequently Asked Questions
How hard is it to replace a car touchscreen?
For most factory touchscreen replacements, the difficulty level is beginner to intermediate. If you can follow step-by-step instructions and work carefully with trim panels, you can handle this job. Most installs take 30 to 90 minutes with no prior automotive experience required.
Do I need special tools to replace a car touchscreen?
Most replacements require only basic tools: a set of plastic trim removal tools, a small Phillips or Torx screwdriver, and occasionally a 7mm or 10mm socket. Avoid metal screwdrivers on trim panels to prevent cracking clips or scratching surfaces.
Will replacing my touchscreen void my car warranty?
Replacing a factory touchscreen with a direct OEM-style replacement generally does not void your vehicle warranty under the Magnuson-Moss Warranty Act. A dealer cannot void your warranty simply because you replaced a part yourself, unless they can demonstrate the replacement part caused a specific failure.
How long does it take to replace a car touchscreen?
Most first-timers complete the swap in 45 to 90 minutes. Experienced DIYers often finish in 30 minutes or less. The biggest time variable is how carefully you need to work the trim panels free on your specific vehicle.
Can I replace my car touchscreen myself or do I need a dealer?
You can replace most factory touchscreens yourself without a dealer visit. Direct-fit replacement screens from Cuescreens connect to your vehicle's existing wiring harness with no programming, coding, or dealer tools required.
What vehicles does Cuescreens make touchscreen replacements for?
Cuescreens makes new touchscreen replacements for GM, Chrysler, Jeep, RAM, Hyundai, Kia, Mazda, Subaru, Acura, Honda, and Buick vehicles. All products are new, never refurbished.
About the Author
Daniel Gigante has over 18 years of experience in the automotive industry, with a focus on vehicle technology, infotainment systems, and real-world reliability. He writes about automotive design, touchscreen usability, and how modern technology impacts everyday driving.
![[Premium] Upgraded Gel-Free Cadillac CUE Replacement Touch Screen Display-Cuescreens](http://www.cuescreens.com/cdn/shop/files/7c1892_b5fcaf040dfe42abb289e47b1fa91ab9_mv2.png?v=1738265347&width=460)


![[Premium] Upgraded Gel-Free Cadillac CUE Replacement Touch Screen Display-Cuescreens. Supports Proximity Sensors.](http://www.cuescreens.com/cdn/shop/files/7c1892_7faa9297eab444d5a99838357b9c178c_mv2.png?v=1764720901&width=460)