A delaminating touchscreen looks bad, and the instinct is to clean it. That instinct is right — but technique matters. The wrong approach can accelerate the damage significantly. Here is exactly how to clean a delaminating automotive touchscreen safely, what products to avoid, and the point at which cleaning is no longer the answer.
What Is Delamination and Why Does It Happen?
Delamination is the breakdown of the adhesive layer that bonds the digitizer glass — the touch-sensitive layer on the front of your screen — to the LCD panel beneath it. When that adhesive fails, air, moisture, and debris work their way between the layers, producing the bubbles, haze, milky discoloration, and lifted edges that drivers recognize immediately.
The root cause is almost always heat. Vehicle interiors routinely exceed temperatures that the factory adhesive in many infotainment screens was not engineered to sustain over years of daily use. UV exposure through the windshield accelerates the process. Humidity cycling — hot days followed by cool nights — stresses the bond further. Over time, even screens that looked fine at year two or three begin to show visible delamination by years five or six.
Certain vehicles are especially prone to this failure. Cadillac CUE systems, Mazda infotainment screens, Hyundai and Kia units from the late 2010s through early 2020s, and various Subaru, Jeep, and Chrysler platforms all used gel-based adhesive systems that did not hold up well in real-world automotive conditions. If your vehicle is on that list and your screen is starting to bubble, you are dealing with a known and well-documented hardware issue — not something you caused.
What Not to Do First: Common Mistakes That Make It Worse
Before getting into what works, it is worth being direct about what does not — because several of the most intuitive responses to a dirty, bubbling screen will accelerate the damage.
Do Not Press Down on Bubbles
Attempting to press bubbles flat is one of the most common and damaging mistakes. The adhesive has already failed in those areas. Applying pressure pushes air and any trapped moisture further between the layers, enlarging the separation zone. In severe cases, it can crack the digitizer glass from the inside.
Do Not Use Ammonia-Based or Alcohol-Heavy Cleaners
Standard household glass cleaners — Windex being the most common — contain ammonia. Ammonia degrades the optical coatings on touchscreen digitizers and attacks the already-weakened adhesive layer at the edges of delaminated areas. Products with alcohol concentrations above 70% carry a similar risk. These are not safe for any touchscreen, but on a delaminating surface they are particularly harmful.
Do Not Use Paper Towels or Rough Cloths
Paper towels, tissues, and standard shop rags are abrasive enough to scratch digitizer coatings even on healthy screens. On a delaminating screen where the surface layer may already be compromised, they can lift or peel the top coating further.
Do Not Apply Liquid Directly to the Screen
Liquid applied directly to a delaminating surface can wick beneath the lifted edges of the digitizer, reaching the adhesive layer and the LCD below. This can cause permanent discoloration, dark spots, and LCD damage that no amount of cleaning will fix.
Do Not Clean While the Screen Is Hot
After the vehicle has been sitting in the sun or following extended use, the screen and its adhesive layer are warm and more pliable. Cleaning pressure applied to a warm screen is more likely to shift, lift, or further separate the delaminated layers. Always let the screen cool fully before attempting any cleaning.
How to Safely Clean a Delaminating Screen: Step by Step
Step 1: Power Off and Let the Screen Cool Completely
Turn off the vehicle. If the screen has been in use or the car has been sitting in the sun, wait at least 15 to 20 minutes before touching the surface. A cool screen means a more stable adhesive layer and a significantly lower risk of spreading delamination during cleaning.
Step 2: Inspect Before You Touch
In natural light — or with a flashlight held at an angle — examine the full surface of the screen. Note exactly where the bubbles, haze, or lifted edges are located. These are the zones to actively avoid pressing during cleaning. Mapping these areas before you start prevents accidental pressure in the wrong spot.
Step 3: Start With a Dry Microfiber Cloth
Use a clean, high-quality microfiber cloth — the type used for eyeglasses or camera lenses, not a general-purpose shop microfiber. Apply zero pressure. Use light, straight strokes in one direction. Never use circular scrubbing motions, which concentrate pressure unevenly and stress the digitizer surface.
For most routine cleaning — fingerprints, dust, smudges — a dry microfiber is sufficient and introduces the least risk.
Step 4: Apply Cleaning Solution to the Cloth, Not the Screen
If dry wiping is not enough, apply a small amount of a digitizer-safe automotive screen cleaner to the cloth first. The cloth should be barely damp — not wet. Never spray or drop liquid directly onto the screen surface. Work around delaminated zones rather than over them.
Step 5: Follow Immediately With a Dry Microfiber
Use a second, dry microfiber to remove any residual moisture before it has a chance to migrate toward lifted edges. Do not let any dampness sit on the screen.
Step 6: Inspect Again After Cleaning
Once the screen is dry, check it again under light. If any areas look worse — new lifting, spreading haze, or discoloration — stop cleaning and assess whether the screen has progressed to a point where replacement is the more appropriate next step.
What Cleaning Products Are Safe — and Which Are Not
| Product / Ingredient | Safe for Delaminating Screens? | Why |
|---|---|---|
| Dry microfiber cloth | Yes — preferred | Zero chemical risk; handles most routine cleaning |
| Digitizer-safe automotive screen cleaner | Yes | Formulated for LCD and digitizer surfaces; no harsh solvents |
| Distilled water (lightly dampened cloth) | Yes — use sparingly | No chemical additives; low risk if applied to cloth, not screen directly |
| Isopropyl alcohol 70% or less (applied to cloth) | Caution — avoid on delaminated areas | Can attack weakened adhesive near lifted edges; use only on intact zones if necessary |
| Windex or ammonia-based glass cleaners | No | Ammonia degrades optical coatings and adhesive; causes further delamination |
| Bleach or disinfectant wipes | No | Harsh chemical composition damages digitizer coating |
| Acetone or nail polish remover | No | Dissolves adhesive layers and digitizer coatings immediately |
| Paper towels or tissues | No | Abrasive enough to scratch and lift compromised digitizer surfaces |
The Limits of Cleaning: When It Is No Longer Enough
Cleaning a delaminating screen can improve its appearance temporarily and prevent additional surface contamination from compounding the problem. What it cannot do is reverse the underlying adhesive failure.
Delamination is a progressive condition. Once the adhesive bond between the digitizer and LCD has started to break down, it will continue to degrade — accelerated by each heat cycle, each UV exposure, and each day of use. No cleaning product, no DIY re-adhesion attempt with generic adhesive, and no amount of careful maintenance will stop that progression.
The signs that cleaning has reached its limit:
- Bubbles that are growing in size or number between cleanings
- Haze or milky discoloration spreading across the display area
- Lifted edges at the corners or sides of the digitizer
- Ghost touches — the screen registering inputs that were never made
- Zones of the screen that no longer respond to touch at all
- Visible darkening or discoloration of the LCD layer beneath the glass
Any of these symptoms means the delamination has progressed beyond what surface care can address.
When Replacement Is the Right Call
A delaminating infotainment screen does not require replacing the entire head unit. In most vehicles, the digitizer and LCD assembly can be replaced independently — restoring full screen function at a fraction of dealer cost.
The critical factor is what the replacement screen is built with. Many of the factory screens that delaminate used gel-based optical adhesive systems that performed adequately at the time of manufacturing but were not designed to hold up over years of automotive heat cycles. A replacement screen built with a gel-free construction eliminates that failure point entirely.
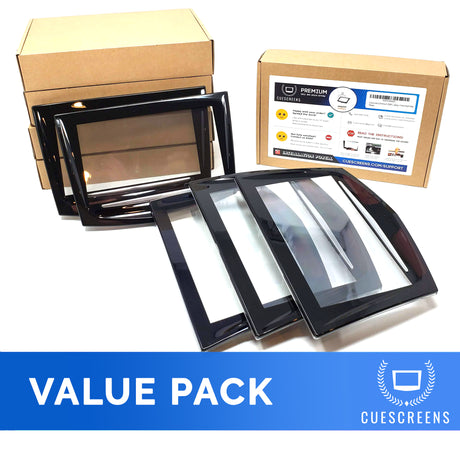
Cuescreens builds its replacement screens specifically to solve this problem. Every Cuescreens screen is gel-free by design, individually tested before shipping, and engineered to meet or exceed OEM specifications for clarity, touch sensitivity, and long-term durability. Cuescreens covers Cadillac, Jeep, Dodge, Chrysler, Subaru, Mazda, Hyundai, Kia, Toyota, GMC, Chevrolet, and more. Where dealers often quote $1,000 to $1,800 for a full module swap, a Cuescreens replacement typically runs under $150 — with DIY installation guides and access to a nationwide installer network included.
If your screen has reached the point where cleaning is no longer managing the symptoms, browse the Cuescreens replacement screen catalog to find the correct unit for your vehicle.
Frequently Asked Questions
Can you clean a delaminating car touchscreen?
Yes, but carefully. You can safely remove surface dirt, fingerprints, and loose debris using a dry or lightly dampened microfiber cloth and a digitizer-safe cleaning solution. Avoid any pressure on bubbled or lifted areas, and never use ammonia-based cleaners, alcohol above 70%, or abrasive materials — these accelerate delamination. You can find our cleaning kit here.
What causes a car touchscreen to delaminate?
Delamination occurs when the adhesive layer bonding the digitizer glass to the LCD beneath it breaks down. Heat is the primary driver — vehicle interiors regularly reach temperatures the factory adhesive was not designed to withstand long-term. UV exposure, humidity, and age all accelerate the process. Many factory screens, particularly older Cadillac CUE, Hyundai, Kia, Mazda, and Subaru units, used gel-based adhesive systems especially prone to this failure.
Will cleaning fix delamination?
No. Cleaning can make a delaminating screen look better temporarily and prevent additional surface damage, but it cannot reverse adhesive breakdown. Once delamination has started, it will continue to progress. The only permanent fix is replacing the screen with a unit that uses a gel-free adhesive system.
What cleaning products are safe for car touchscreens?
Use a dry microfiber cloth for routine cleaning. For deeper cleaning, use a digitizer-safe formula designed for automotive infotainment screens — free of ammonia, bleach, acetone, and high-percentage alcohol.
When should I replace instead of clean my delaminating touchscreen?
If your screen shows visible bubbles, lifted edges, discoloration between the layers, ghost touches, or unresponsive zones, cleaning will not resolve the issue. These are signs of active delamination requiring screen replacement. Cuescreens' gel-free replacement screens are available for most major vehicle brands at a fraction of dealer pricing.
About the Author
Daniel Gigante has over 18 years of experience in the automotive industry, with a focus on vehicle technology, infotainment systems, and real-world reliability. He writes about automotive design, touchscreen usability, and how modern technology impacts everyday driving.
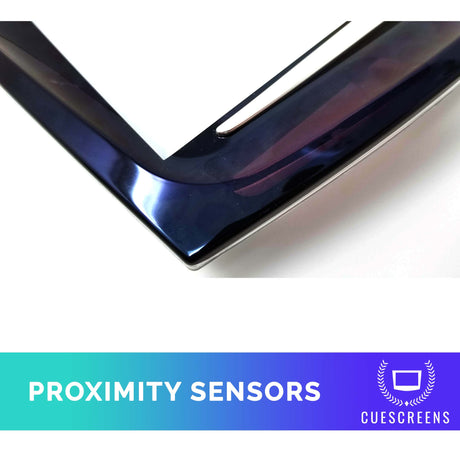
![[Premium] Upgraded Gel-Free Cadillac CUE Replacement Touch Screen Display-Cuescreens](http://www.cuescreens.com/cdn/shop/files/7c1892_b5fcaf040dfe42abb289e47b1fa91ab9_mv2.png?v=1738265347&width=460)


![[Premium] Upgraded Gel-Free Cadillac CUE Replacement Touch Screen Display-Cuescreens. Supports Proximity Sensors.](http://www.cuescreens.com/cdn/shop/files/7c1892_7faa9297eab444d5a99838357b9c178c_mv2.png?v=1764720901&width=460)